Intro To Comic Craft: Step by Step: Creating Thumbnails
This series is also made possible thanks to the generosity and interest of my Patrons on Patreon.

My have expressed interest in content on the comic making process, and I am happy to oblige. Comics are one of my passions, and they're the reason I began this blog in the first place. It isn't always easy to share comic content here, but their generosity has made it easier to set aside the time and resources necessary to doing so. Writing about comic craft in depth requires research, setting aside time during the comic creation process to document my progress, and a lot of thought, and I feel is best served through longform series such as the Intro to Comic Craft: Step By Step series. If you enjoy this series, please take a moment to share it with your friends and loved ones on the social network of your choice, leave me a G+ comment, or send me an email using the sidebar form- your feedback is important to me! If you have specific questions, please don't hesitate to ask via email.
As part of this series, my Patrons have exclusive access to behind the scenes comic creation content, including the entire plotform synopsis for 7" Kara, the 7" Kara beat sheet, the Chapter 7 Synopsis, the Chapter 7 tight script, and loads more. If you learn best from working example, joining my Patreon will give you access to those files.
What are thumbnails?
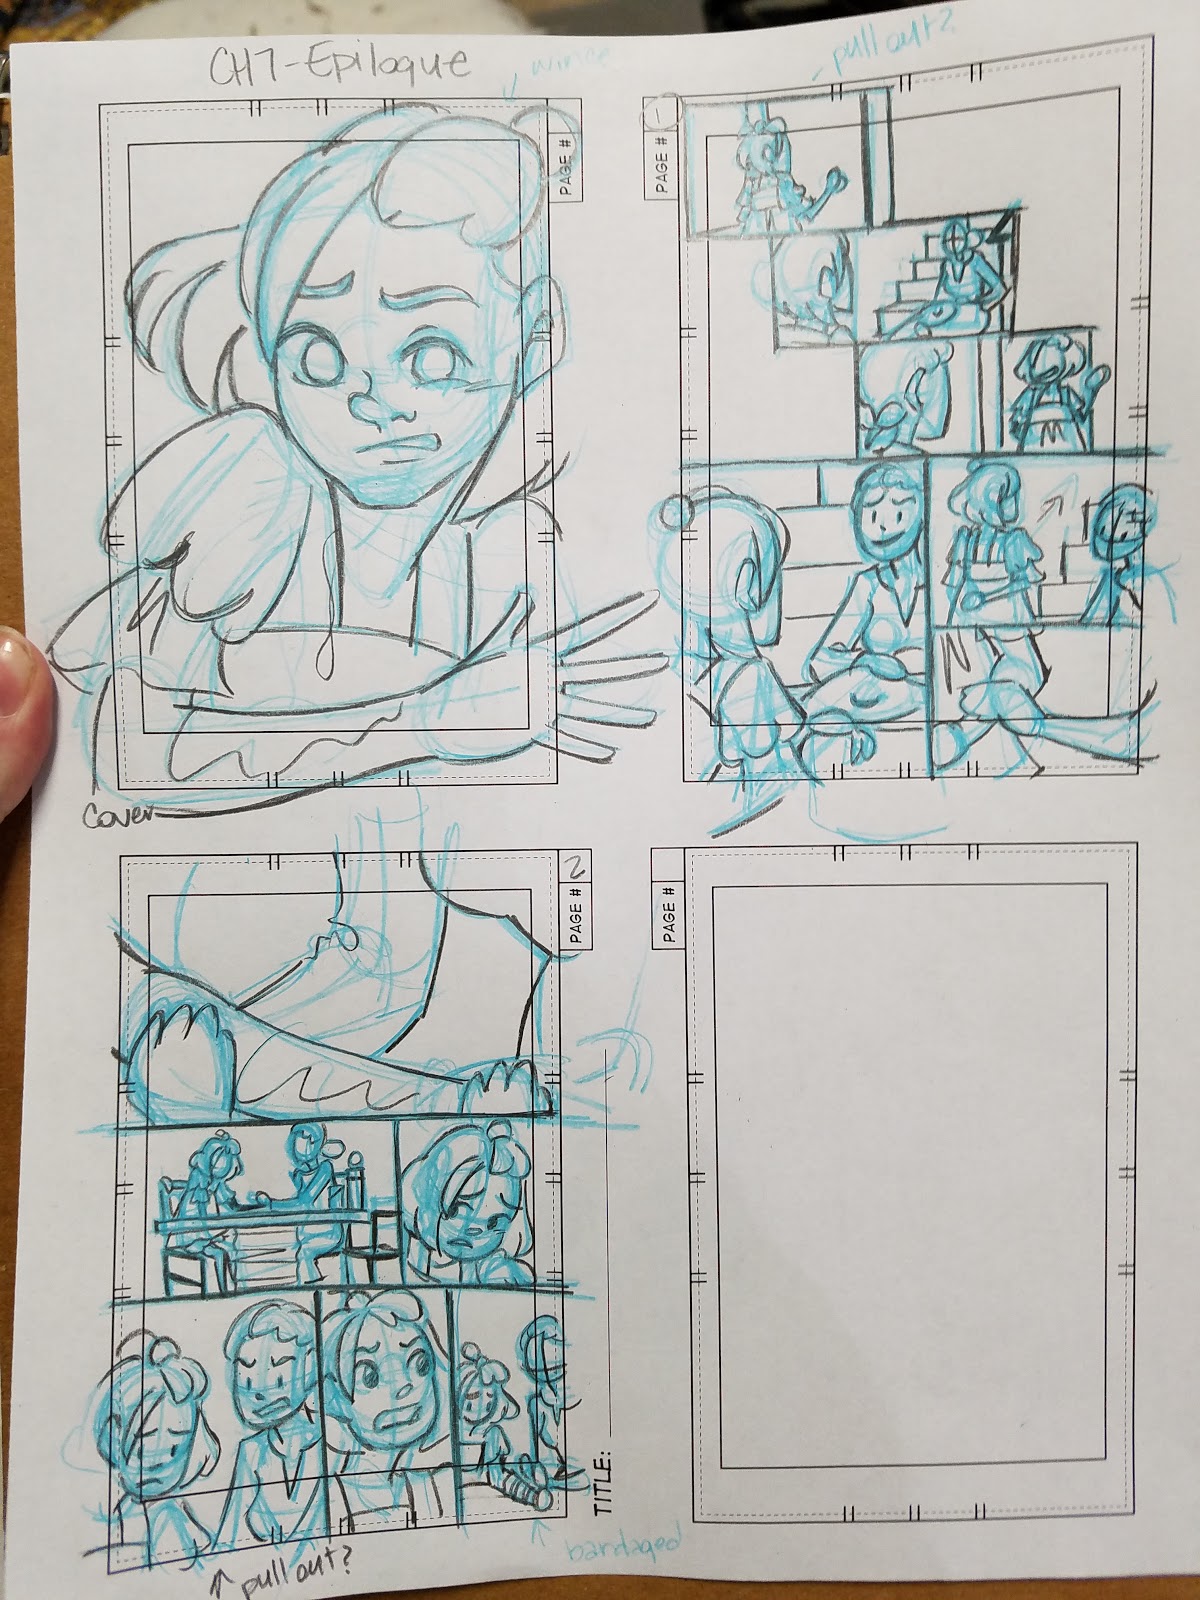
Thumbnails are a rough sketch (I really like to think of them as a map or guideline) for your entire comic page. They include the action from every panel, basic character acting, and basic background indications. Your thumbnails are your opportunity to play director and stage your comic- shot choices are made in the thumbnail stage.
For more information on shot choices, please read:
The 5 C's of Cinematography
Understanding Comics
Drawing Words and Writing Pictures
Why Create Thumbnails? Why not go straight to page?
Thumbnails are an opportunity for you to play around with your comic ideas. You can take risks with composition, set design, character placement, and more, and see immediately whether or not those risks worth, or are even worth it. Thumbnails are an opportunity to visually tell your story and solve problems, and to get some feedback on your storytelling skills from other artists.
For a long-term project like 7" Kara, I rely heavily on thumbnails to provide the framework for later stages. My thumbnails are the blueprint for my roughs, which are the blueprint for my pencils- each stage allowing for further refinement and improvement.
If you feel comfortable going straight to your final page, or if you create comics under a time crunch, by all means skip the thumbnail stage. But if you've never tried multi-stage comics, or if you're planning a comic that is longer than 1 page, I highly recommend you give thumbnails a try!

As part of this series, my Patrons have exclusive access to behind the scenes comic creation content, including the entire plotform synopsis for 7" Kara, the 7" Kara beat sheet, the Chapter 7 Synopsis, the Chapter 7 tight script, and loads more. If you learn best from working example, joining my Patreon will give you access to those files.
What are thumbnails?
Thumbnails are a rough sketch (I really like to think of them as a map or guideline) for your entire comic page. They include the action from every panel, basic character acting, and basic background indications. Your thumbnails are your opportunity to play director and stage your comic- shot choices are made in the thumbnail stage.
For more information on shot choices, please read:
The 5 C's of Cinematography
Understanding Comics
Drawing Words and Writing Pictures
Why Create Thumbnails? Why not go straight to page?
Thumbnails are an opportunity for you to play around with your comic ideas. You can take risks with composition, set design, character placement, and more, and see immediately whether or not those risks worth, or are even worth it. Thumbnails are an opportunity to visually tell your story and solve problems, and to get some feedback on your storytelling skills from other artists.
For a long-term project like 7" Kara, I rely heavily on thumbnails to provide the framework for later stages. My thumbnails are the blueprint for my roughs, which are the blueprint for my pencils- each stage allowing for further refinement and improvement.
If you feel comfortable going straight to your final page, or if you create comics under a time crunch, by all means skip the thumbnail stage. But if you've never tried multi-stage comics, or if you're planning a comic that is longer than 1 page, I highly recommend you give thumbnails a try!
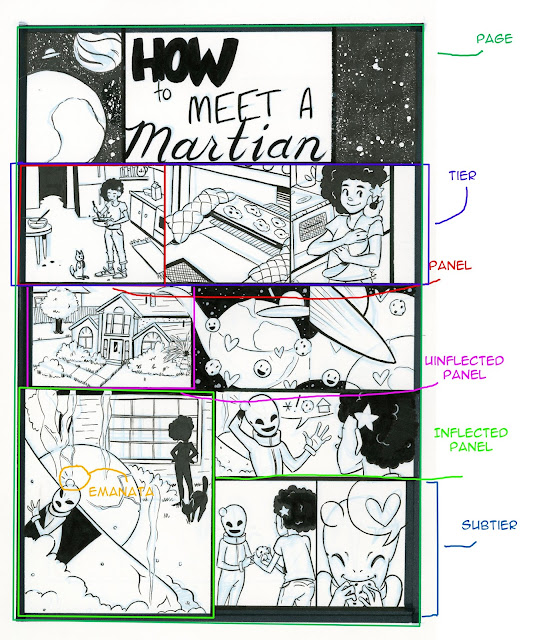
Find a thumbnail layout that works for you.
Below is the guideline I use
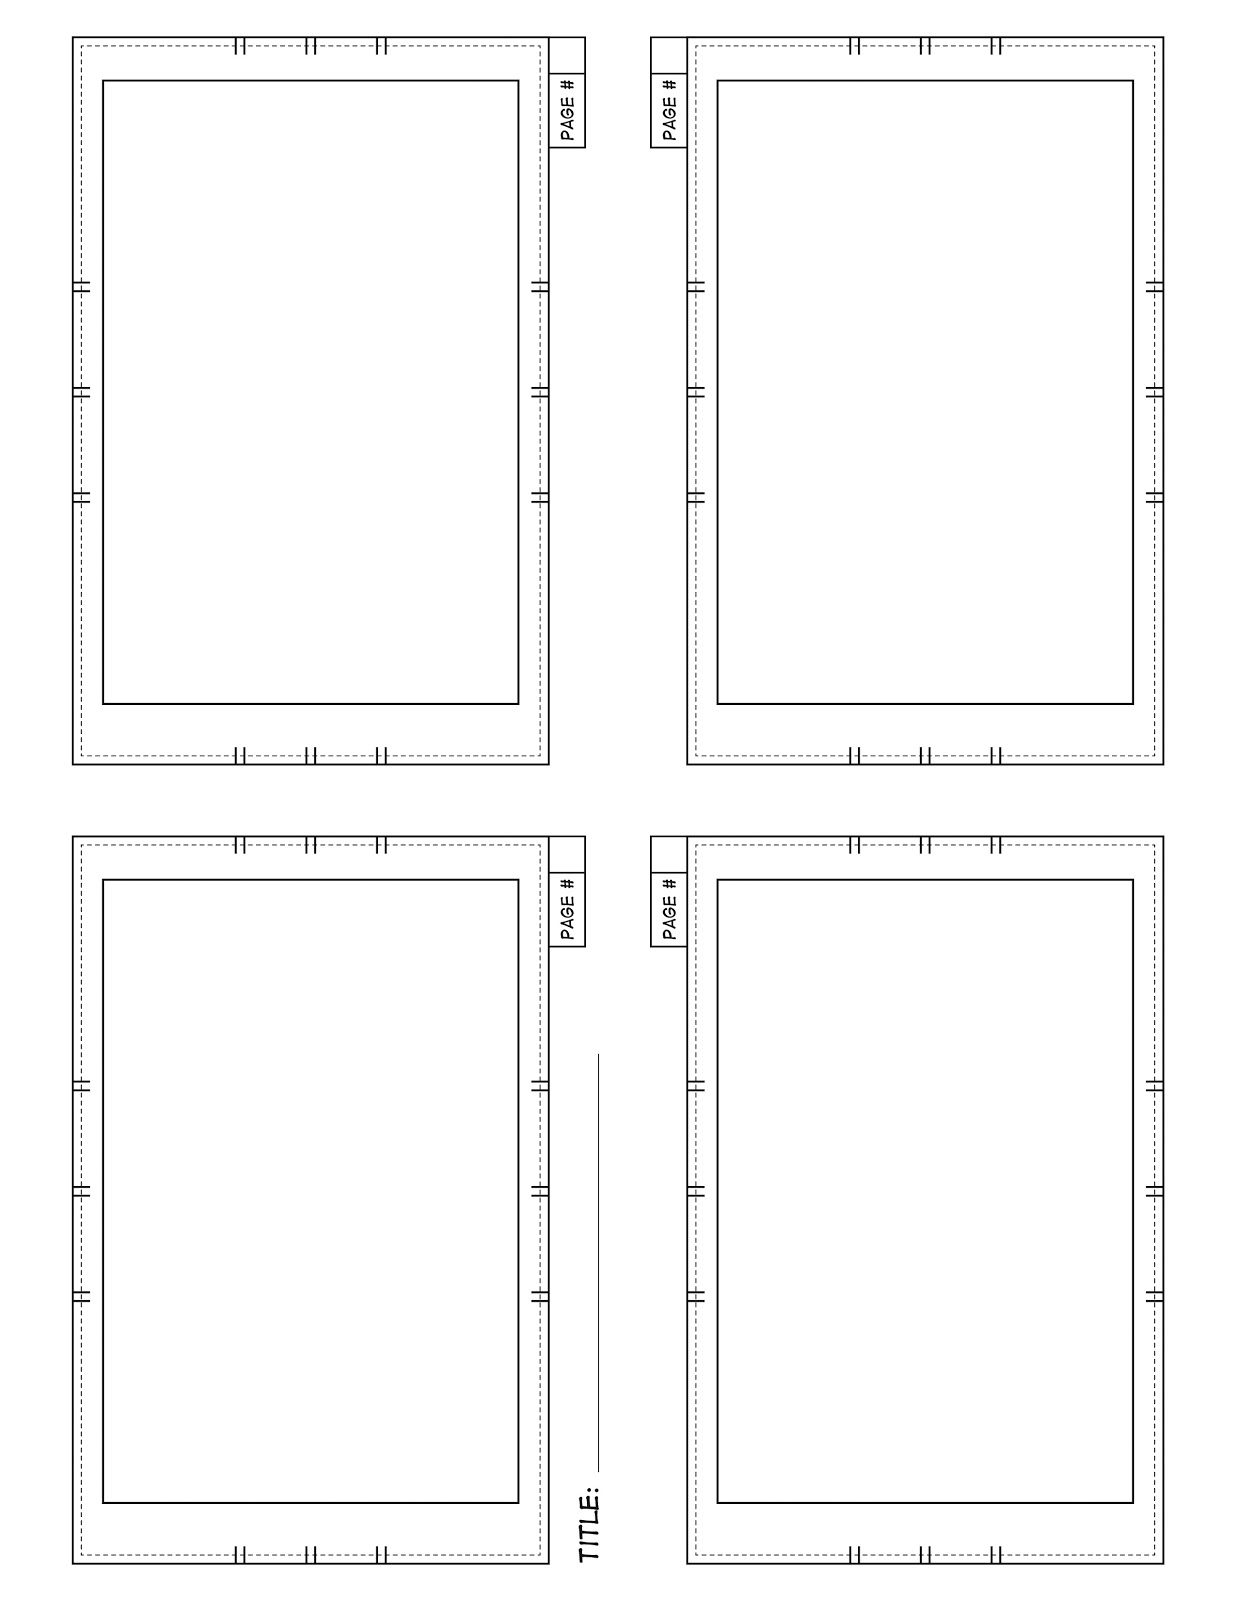

Dotted Rectangle: Between the inner rectangle and dotted line, your artwork SHOULD be safe, but it's recommended that you don't place important faces or any dialogue in this area.
Solid outer rectangle: Full bleed. Very likely to get cut off to some extent. Do not put anything important past the dotted line.
Hash Marks: Recommendations for border placement.
With the first template, you should get four comic thumbnails per printed page. With the second, you should get a two page spread.
Print enough copies to handle your entire chapter (divide your number of pages by 4)
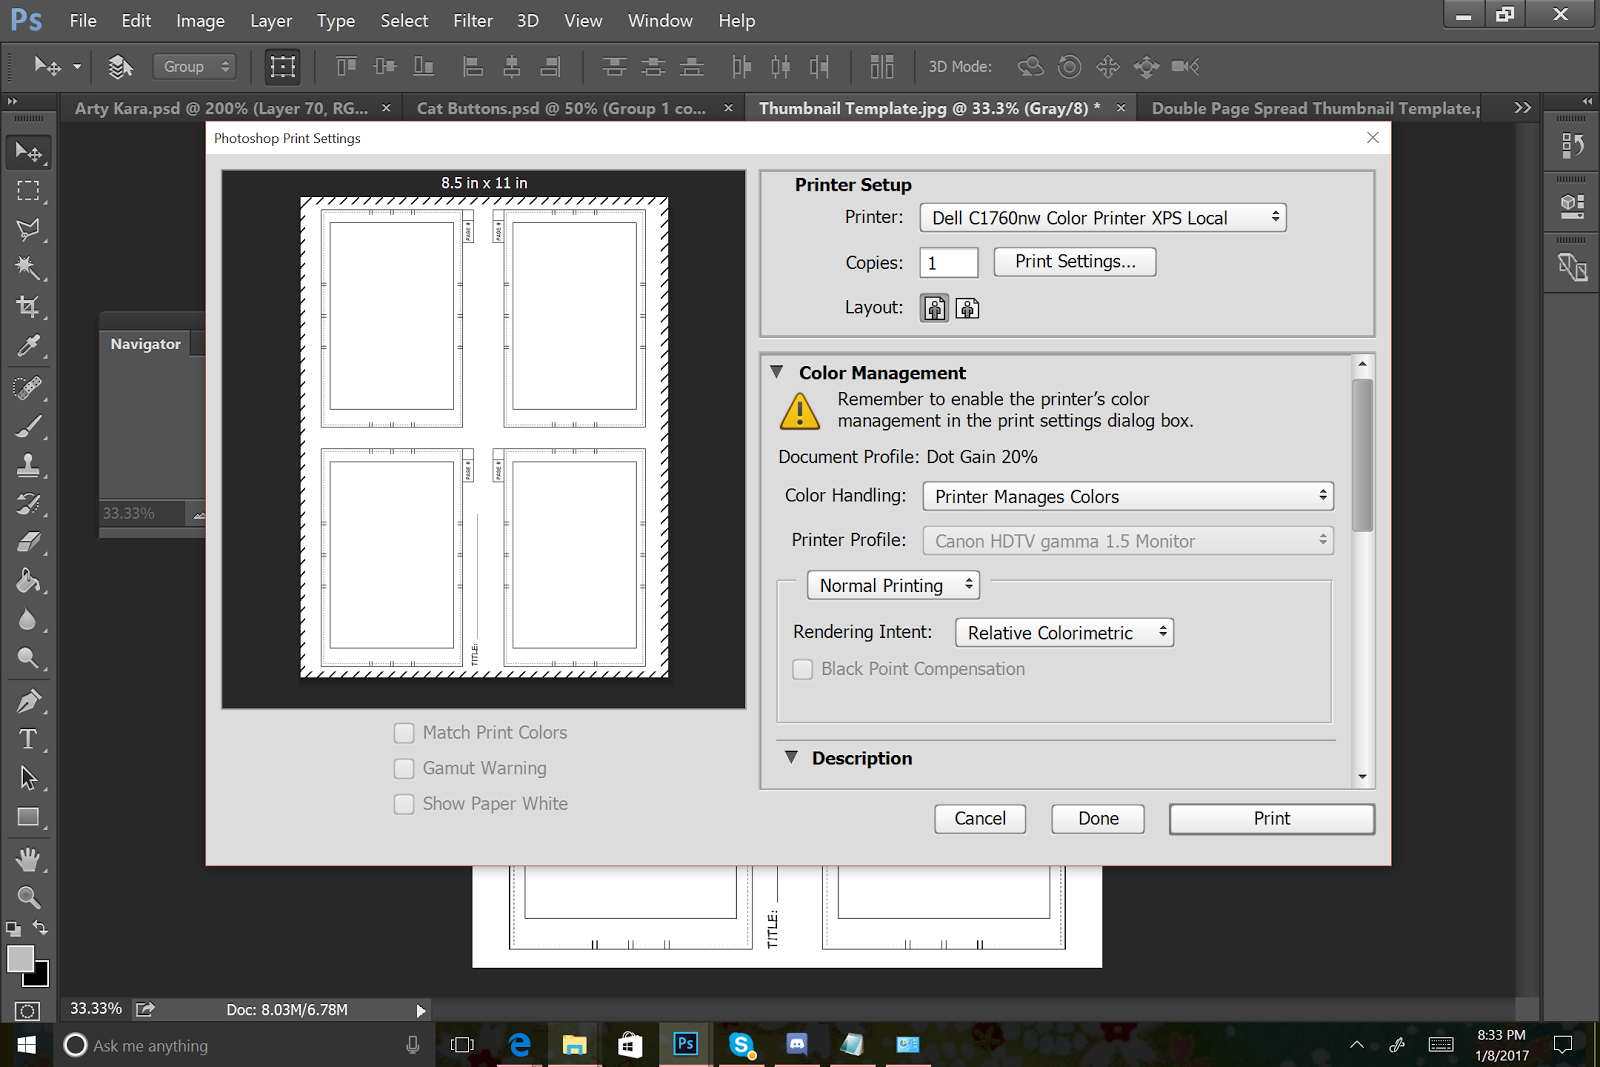
I print my thumbnail templates on 8.5"x11" copy paper- cheap is fine. You want to avoid papers that have a finish or film, as that will make sketching more difficult.
Drawing:
Step 1: Sketch in Layout
We discussed layouts in our last Intro to Comic Craft: Step by Step post.
We discussed layouts in our last Intro to Comic Craft: Step by Step post.
Step 2: Rough sketch for character placement, based on the sketches completed on my script
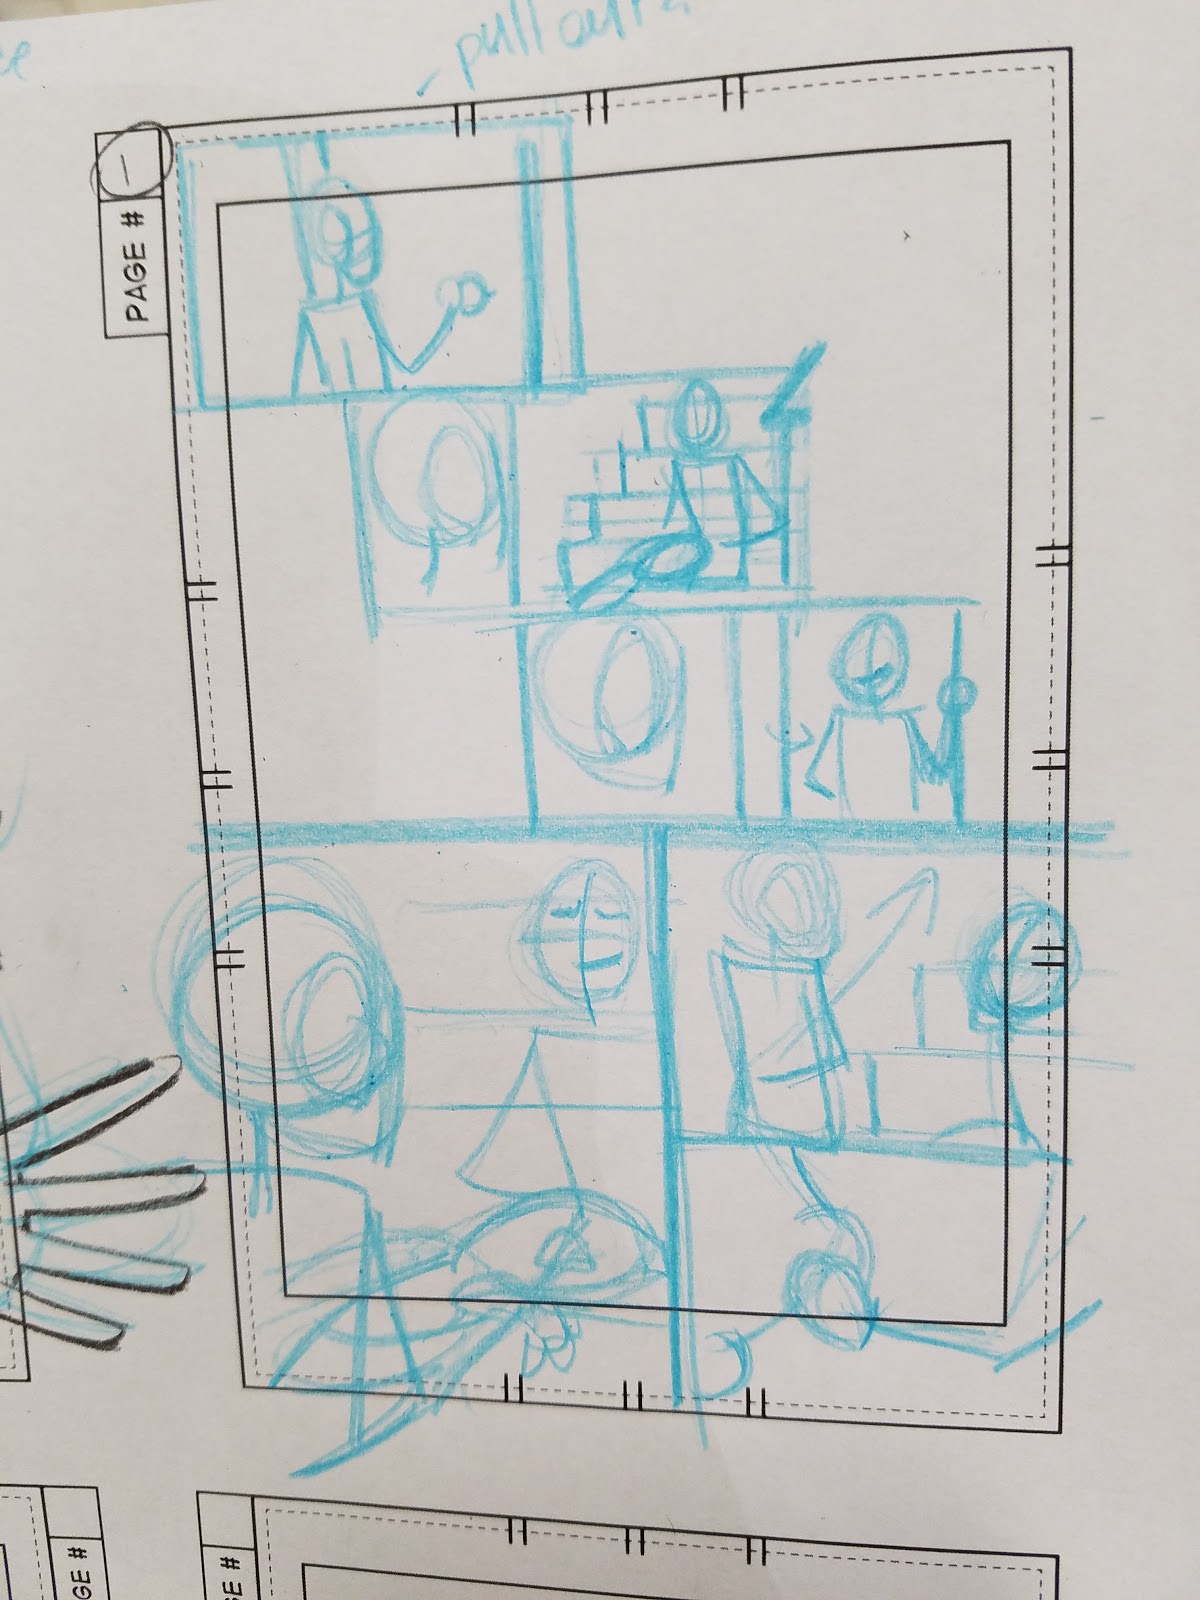
This is sketched using non photo blue lead. I have used Color Eno leads and mechanical pencils for years, and I recommend Soft Blue in .7.
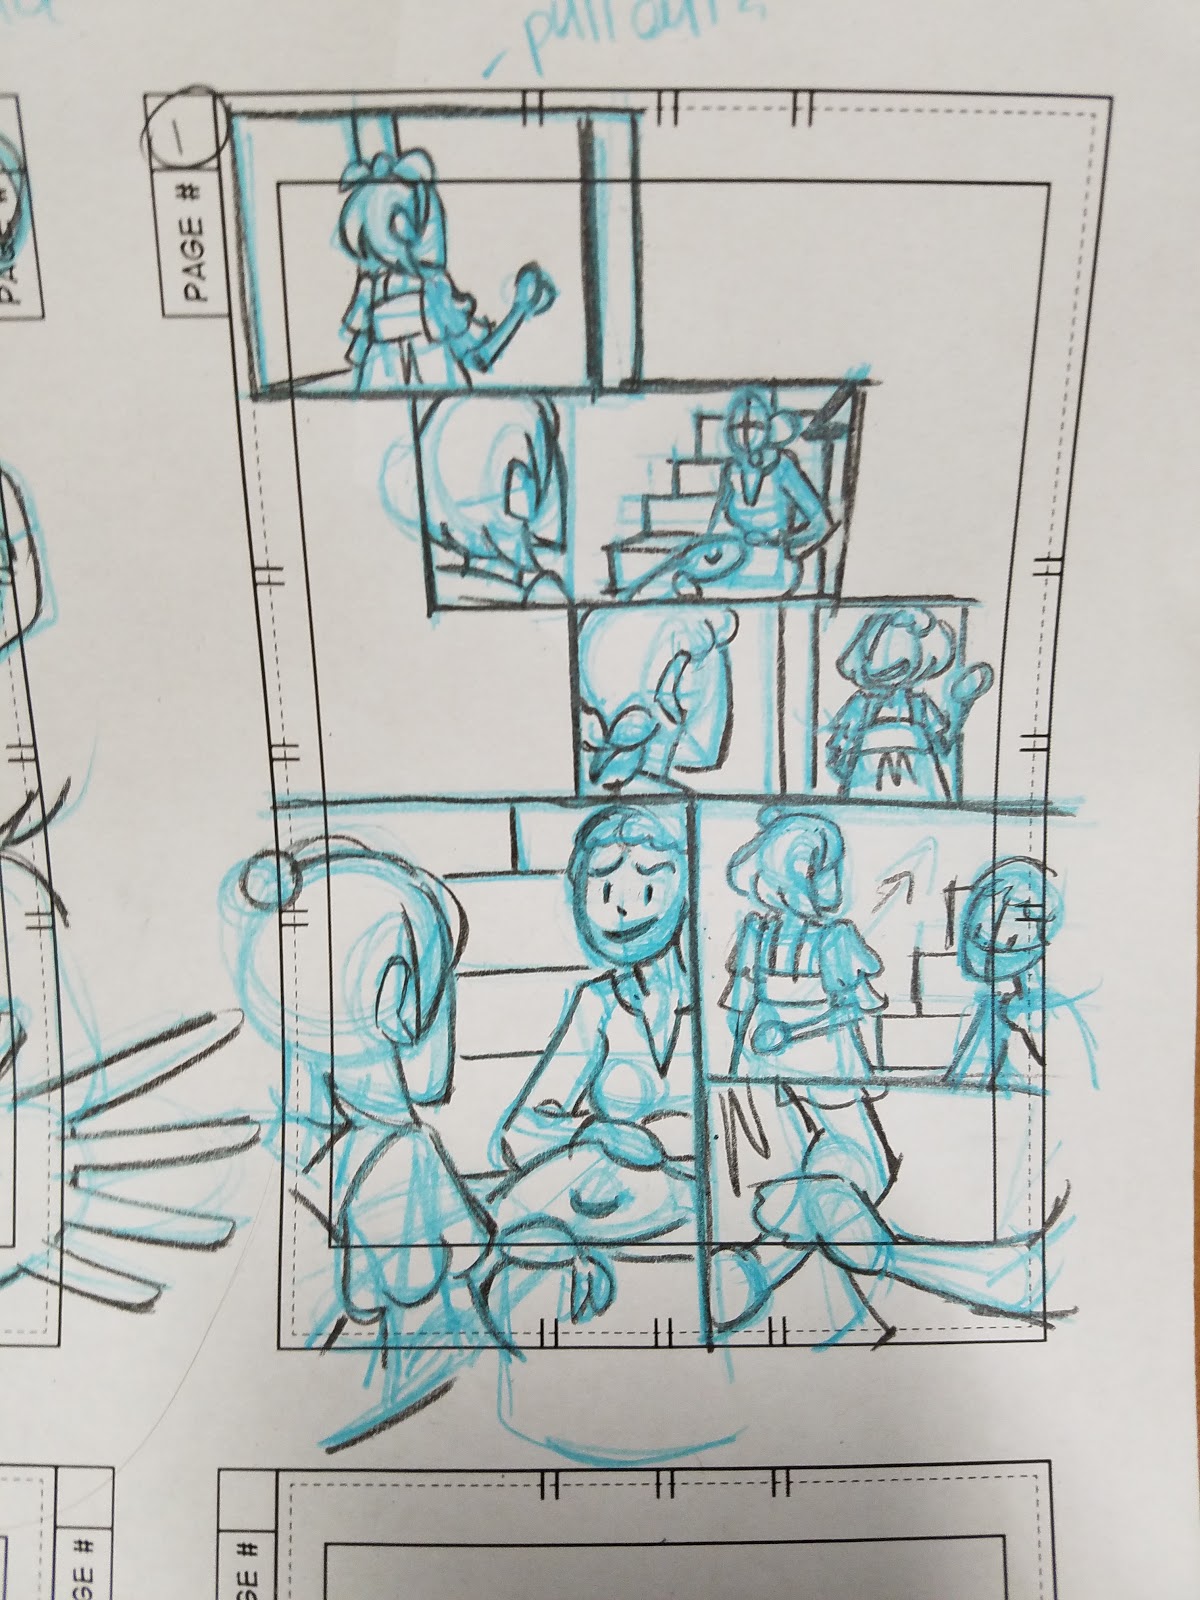
Step 3: refine sketches, adding in pertinent information like background, facial expressions, clothing, and hair.

For my pencil sketches, I use a soft lead- B or softer, as it goes over the waxy blue lead and is easier for the scanner to pick up.
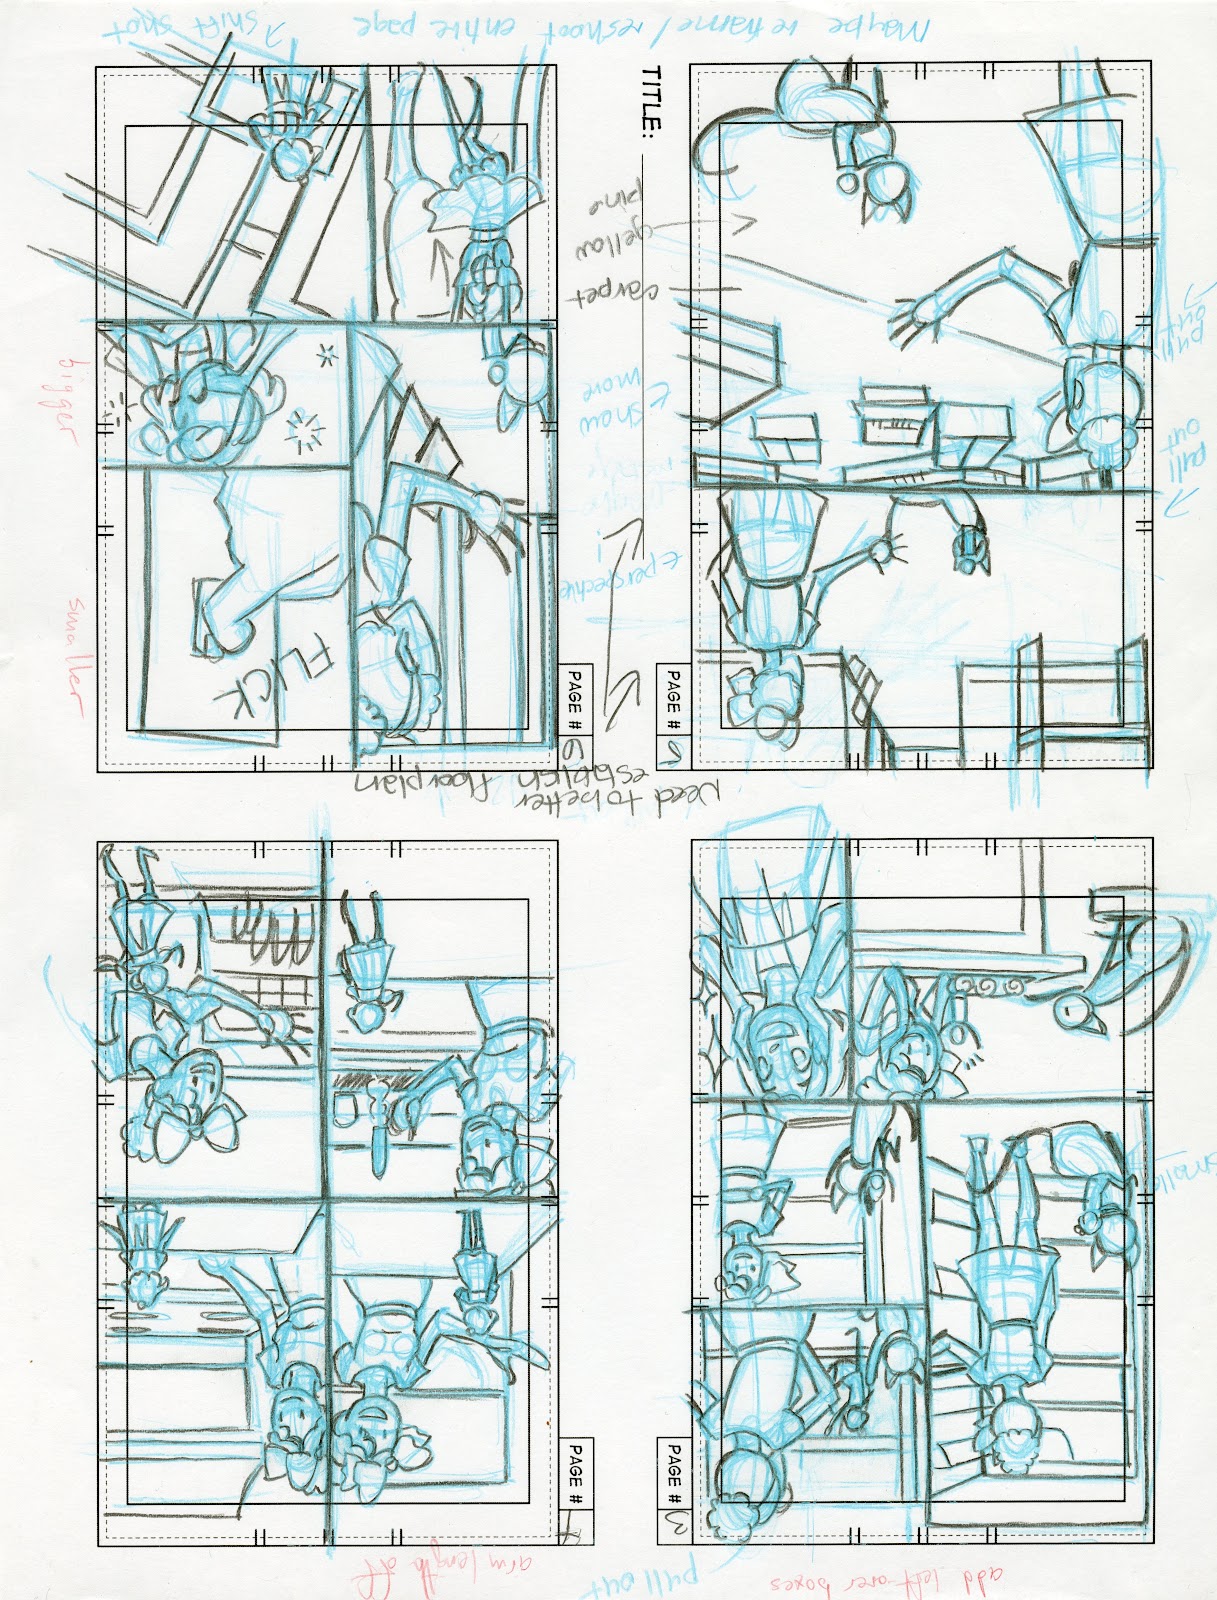
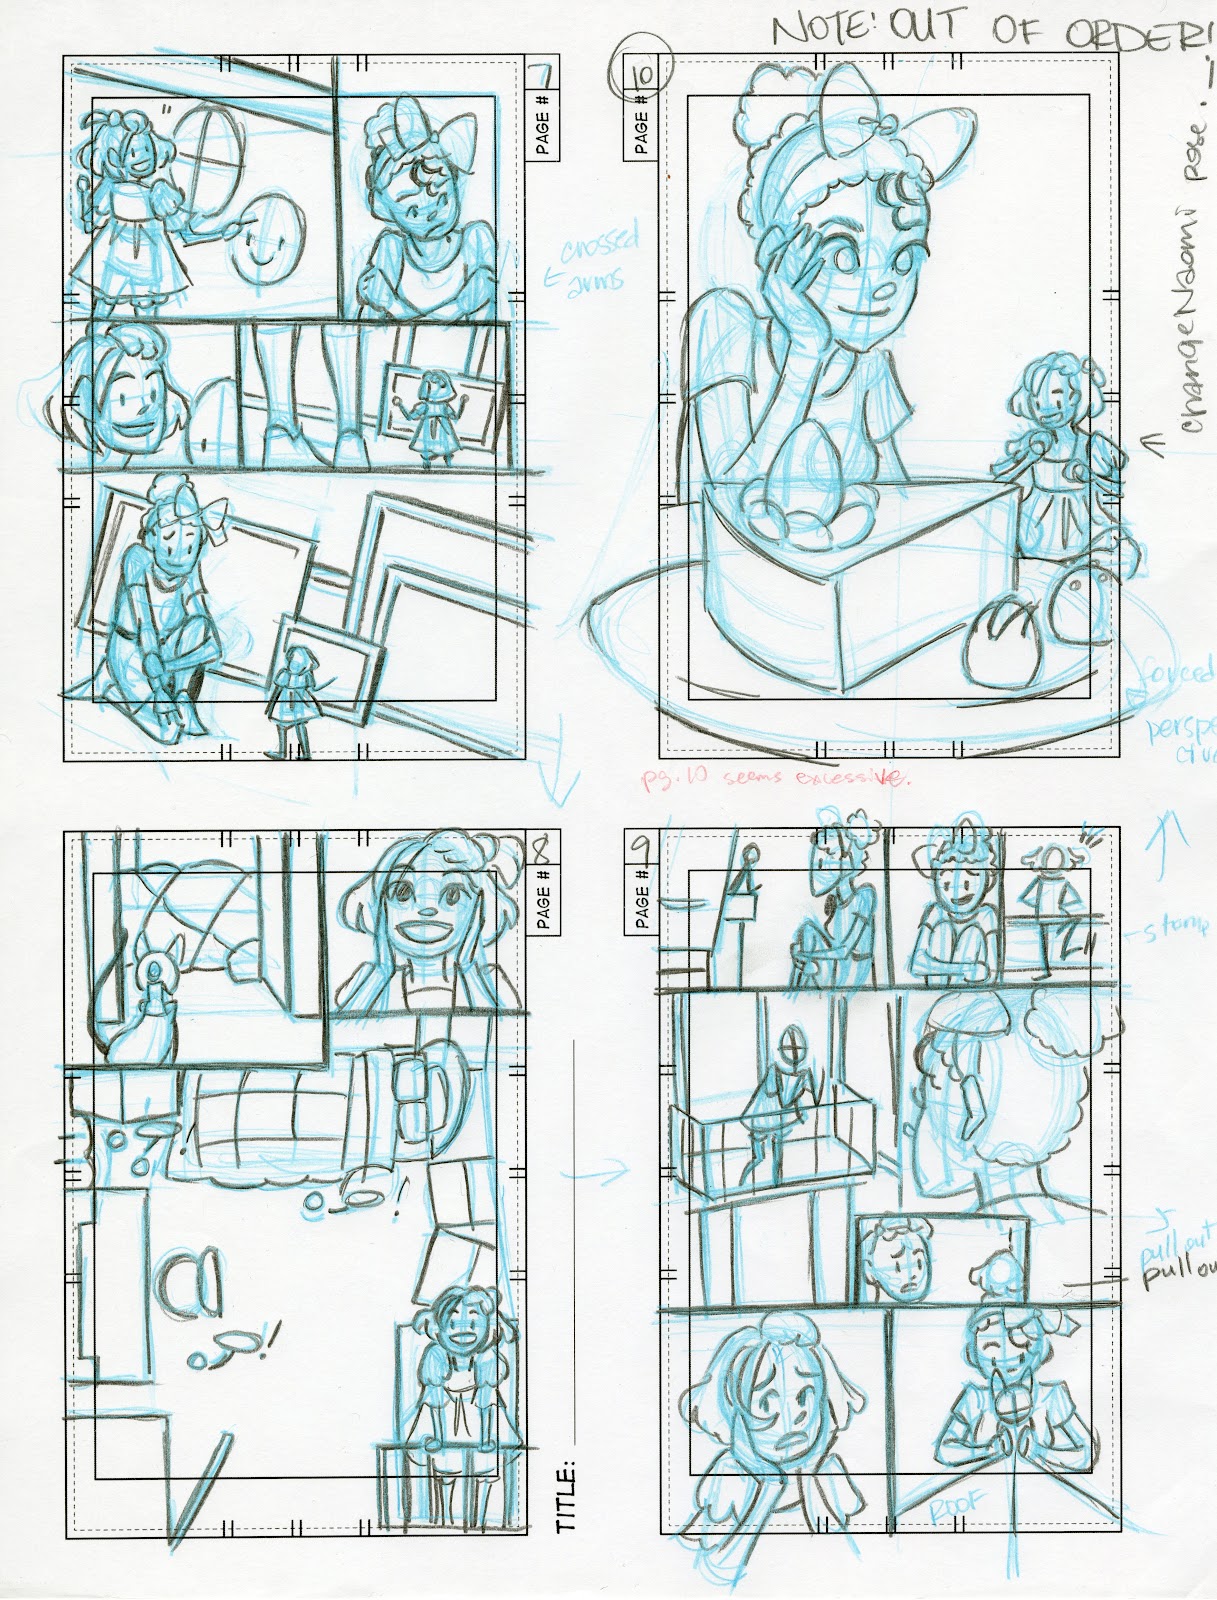
Set of day's allotment of tight thumbnails, on template:
When working on tight thumbnails like these, I try to parcel them out to three finished tight thumbs per day, to prevent burnout and to better distribute my workload.
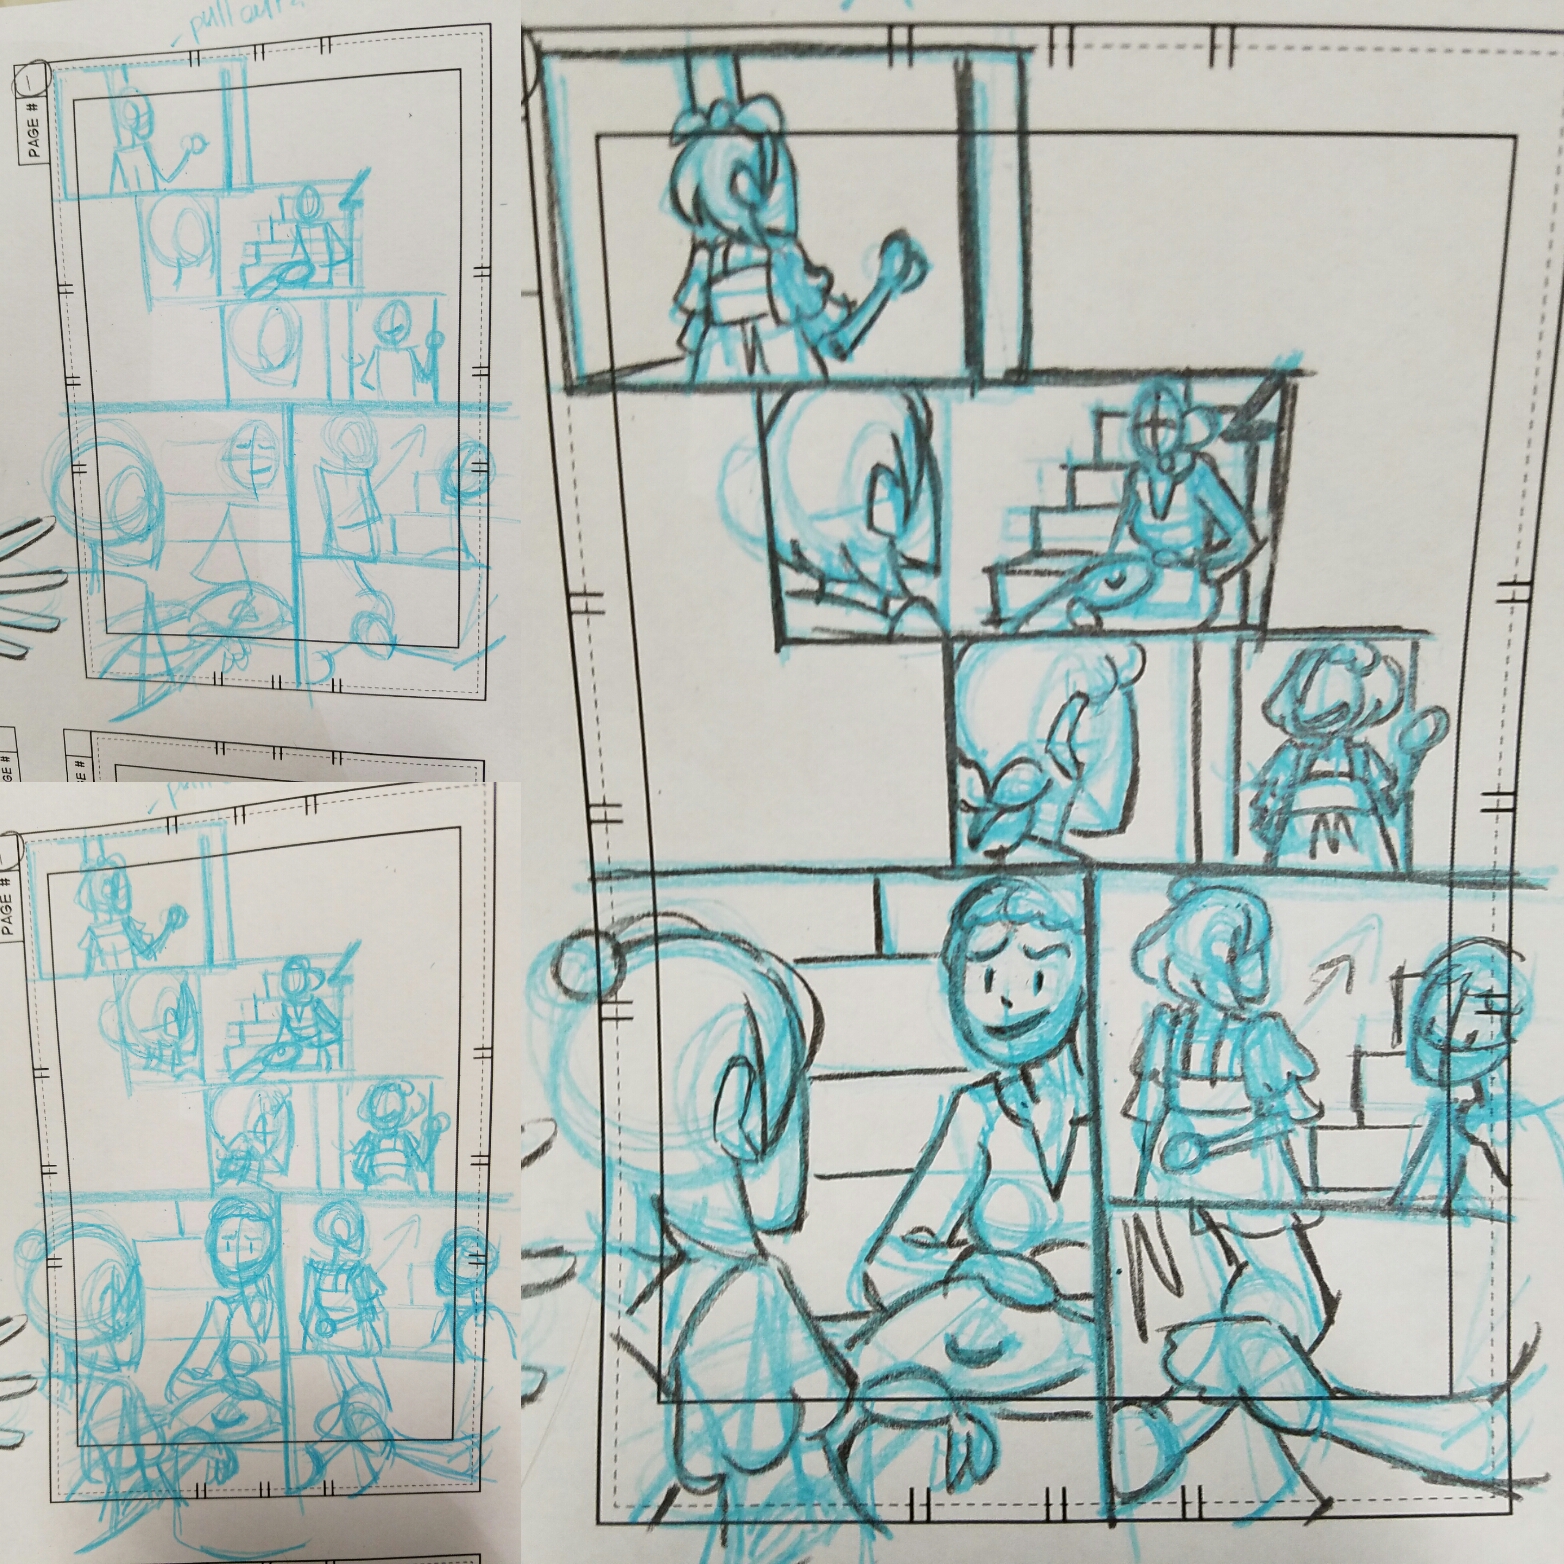 |
| The 3 stages thumbnails undergo |
To see everything in action, check out this Intro to Comic Craft: Thumbnails video:
Sample thumbnails:


Liked what you saw? Well I have great news for you!
This series is sponsored by:

The images used in this installment of Intro to Comic Craft are all from Chapter 7 of 7" Kara, the second chapter in Volume 2. To purchase your own copy of Volume 1, and help support my endeavors, please visit my shop for physical copies, or my Gumroad for PDF copies of Volume 1 or Chapter 5 (the first available chapter in Volume 2)
Comments
Post a Comment